

 Contact Us

 Home /
 Robotic Screwdriving Automation: Torque, Angle, Fastener Feeding, Cross-Thread Detection, and Traceability

Central Vacuum Pump vs On-Tool Ejector: Choosing the Vacuum Source for Robotic Picking
Oct 11, 2026

AMR Tugger Tow Capacity: Drawbar Pull, Cart Resistance, and Starting Loads
Oct 11, 2026
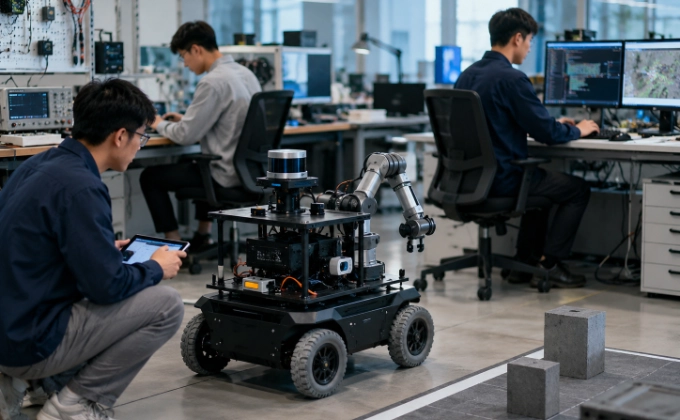
Robotics Teaching Labs: Specify the Student Exercises Before Choosing the Hardware
Oct 11, 2026

SCARA, Delta, or Six-Axis Robot: Choose by Motion, Orientation, and Work Envelope
Oct 11, 2026
The following scenario is illustrative and does not represent data from any specific deployment. A robot is installed to drive screws into an assembly. The robot positions the driver accurately, and the torque sensor confirms that the target torque was reached. In production, 3% of screws are cross-threaded, 2% are missing entirely, and 1% do not seat properly. The torque sensor reported “pass” on the cross-threaded and improperly seated screws, because torque alone does not confirm a good joint. A cross-threaded screw can reach the target torque by binding against the threads rather than by clamping the parts. The missing screws were not detected because the system had no independent fastener presence verification and only checked torque at the end of each cycle, so a missing screw produced no torque signal and triggered no alarm. This article covers how to evaluate robotic screwdriving automation, focusing on the joint, the fastener feeding, the torque-angle relationship, and the traceability that connects each screw to a quality record.
Start With the Joint, Not the Robot
The robot is a positioning platform for the driver. The quality of the fastened joint depends on the fastener, the materials being joined, the thread condition, the clamping force requirement, the access geometry, and the quality specification. These are mechanical and process engineering questions that must be answered before the robot is selected.
The joint analysis should include:
- Fastener specification: Type (machine screw, self-tapping, bolt), size, thread pitch, head type, material, plating
- Material being joined: Hardness, thickness, hole clearance, counterbore or countersink dimensions
- Clamping force requirement: What force must the fastener exert to hold the assembly together? This is not the same as the tightening torque.
- Torque-tension relationship: The conversion from tightening torque to clamping force depends on friction (thread friction and bearing surface friction). A torque specification alone does not guarantee a clamping force unless the friction is known and controlled.
- Access and clearance: Can the driver approach the fastener at the required angle? Is there enough vertical clearance for the driver and bit? Are there obstructions from the part geometry or fixture?
- Quality specification: What defines a good joint? Is it torque only, torque plus angle, torque plus depth, or a functional test (e.g., pull-out force)?
Fastener Feeding and Presentation Choices
Before the robot can drive a screw, the screw must be presented to the robot or the driver. Feeding systems include:
- Bowl feeder: Vibratory bowl that orients and feeds screws to a pickup position. Suitable for a wide range of screw sizes but can be noisy and may damage plating.
- Step feeder: Escalator-style feeder that lifts screws from a bulk hopper and presents them oriented. Gentler on plating than bowl feeders.
- Blow feeder: Screws are blown through a tube directly to the driver nose. Fast and allows the robot to move while the next screw is being fed. Requires screws that can be oriented and blown without jamming.
- Pick-and-place: Screws are pre-loaded in a strip or tray, and the robot picks each one. Slow but reliable for difficult-to-feed screws.
- Preloaded fasteners: Screws are pre-placed in the part (e.g., in a PEM insert or a pre-tapped hole), and the robot only needs to tighten them.
When the feeder becomes the bottleneck
The feeding system can become the cycle time bottleneck. If the robot can position the driver in 2 seconds but the feeder takes 4 seconds to present the next screw, the cycle time is limited by the feeder, not the robot. Feeder problems include:
- Jamming: Screws that bridge or overlap in the feed track
- Misorientation: Screws that arrive upside down or sideways
- Refill downtime: The hopper must be refilled periodically, and the refill time is often not included in the cycle time calculation
- Plating damage: Vibratory feeders can chip or scratch plating, which changes the friction and the torque-tension relationship
The feeder selection should be based on the specific fastener, not on a generic “screw feeder” specification. The buyer should test the feeder with the actual fasteners and confirm the feed rate, jam rate, and refill procedure.
Driver, Spindle, Bit, and Reaction Control
The driver is the tool that applies torque to the fastener. Options include:
- Electric servo driver: Provides precise torque and angle control, programmable speed and torque profiles, and data output for traceability. Most flexible but most expensive.
- Pneumatic driver: Simpler and less expensive, but torque control is less precise and angle measurement may not be available.
- Spindle with integrated torque sensor: Measures torque directly at the spindle for high accuracy. May include angle encoder for torque-angle monitoring.
Bit selection and retention matter:
- Bit type: Phillips, Torx, hex, slot, etc. The bit must match the fastener head to prevent cam-out (the bit riding out of the recess under torque).
- Bit wear: Worn bits cause cam-out, damage to the fastener head, and inconsistent torque transfer. Bit replacement intervals should be defined.
- Bit retention: The bit must be retained in the driver during all motions, including retraction after tightening. A dropped bit in the assembly is a foreign object debris (FOD) risk.
Reaction control: When the driver tightens the fastener, the reaction torque is transmitted through the driver to the robot. For small screws, this is negligible. For large bolts, the reaction torque can exceed the robot's wrist torque limit. A reaction arm or torque-absorbing fixture may be needed to protect the robot.
Alignment, Access, and Compliance
The driver axis must be aligned with the fastener axis. If the part or fixture has positional variation, the driver may approach at an angle, causing cross-threading or bit damage. Compliance mechanisms can accommodate small misalignments:
- Floating nose: A spring-loaded nose piece that allows the driver to self-align to the fastener head
- RCC (Remote Center Compliance): A compliant device that allows lateral and angular misalignment correction
- Vision guidance: A camera on the wrist or near the driver locates the fastener hole and adjusts the robot position
Compliance does not replace good fixture design. If the part position varies by more than the compliance range, the fixture or the part presentation must be improved. Relying on the robot controller to “push harder” to find the hole is not a reliable strategy and can damage the fastener, the part, or the driver.
Robot repeatability versus accuracy explains why positioning claims alone cannot establish joint quality.
Torque-Angle Curves and Joint-Specific Windows
Torque alone is not sufficient to verify a good joint. A cross-threaded fastener can reach the target torque by binding on damaged threads. A fastener that bottoms out in a blind hole can reach the target torque without clamping the parts. A fastener that strips its threads can show a torque drop that looks like a pass if only the final torque is checked.
A torque-angle curve plots torque against rotation angle throughout the tightening cycle. The curve reveals the phases of tightening:
- Run-down (threading): The fastener is being threaded into the hole. Torque is low, driven by thread friction. If the torque rises sharply during this phase, it may indicate cross-threading.
- Seating: The fastener head contacts the bearing surface. Torque begins to rise as the clamping force builds.
- Prevailing torque: If the fastener has a locking feature (e.g., nylon insert, prevailing torque nut), there is a baseline torque before seating.
- Yield: If the fastener is tightened to yield, the torque-angle curve shows a characteristic knee where torque stops rising linearly.
Seating vs thread rundown
The torque-angle window must be defined based on the buyer's actual joint. A generic torque specification (e.g., “tighten to 5 Nm”) does not capture the joint-specific behavior. The buyer should provide sample joints (good and bad) to the supplier or integrator, who can then develop torque-angle windows that distinguish between:
- Good joint (proper seating and clamping)
- Cross-threaded joint (torque rises during run-down, before seating)
- Bottomed-out joint (torque rises sharply at the end, no seating transition)
- Stripped threads (torque drops after reaching a peak)
- Missing fastener (no torque signal at all)
The window definitions should be validated against a statistically significant sample of good and bad joints. Thresholds copied from a different application or a different fastener size are not valid.
Detect Cross-Threading, Missing Fasteners, and False Seating
The detection system must identify several failure modes:
- Cross-threading: Detected by torque rising during the run-down phase (before seating). The torque-angle curve shows an abnormal early torque rise.
- Missing fastener: Detected by no torque signal within the expected time window. If the feeder fails to deliver a screw, the driver spins freely and produces no torque.
- False seating: The fastener appears to be seated (torque reached) but is actually resting on a shoulder or burr, not clamping the parts. Detected by comparing the angle at seating to the expected angle.
- Incomplete seating: The fastener is not fully tightened. Detected by the torque-angle curve not reaching the expected window.
NG detection and recovery
When a failure is detected, the system must stop, flag the joint as NG (not good), and initiate a defined recovery procedure. The recovery may include:
- Backing out and retrying: For cross-threading, the driver reverses and re-attempts the tightening
- Flagging for manual rework: For stripped threads or missing fasteners, the part is flagged and routed to a rework station
- Halting the cycle: If multiple consecutive NGs occur, the system should stop and alert an operator
The system should not continue tightening after a cross-thread is detected. Tightening a cross-threaded fastener further damages the threads and may make rework impossible.
Fixtures and Reaction Loads
The tightening torque generates a reaction force that must be absorbed by the fixture or the part. If the part is not held firmly, it may rotate or shift during tightening, producing inconsistent torque and potentially damaging the part.
Fixture considerations:
- Clamping: The fixture must hold the part firmly enough to resist the tightening torque without deformation
- Reaction path: The reaction torque must be transmitted through the fixture to the base, not through the part itself (which could cause damage)
- Part access: The fixture must provide access for the driver and bit, including clearance for the driver body and any compliance device
- Changeover: If multiple part types are run on the same fixture, the changeover time and the potential for setup errors should be considered
Traceability and Rework Rules
For quality management, each tightening operation should be traceable. The data record for each fastener should include:
- Part ID or serial number: Linking the fastening operation to the specific assembly
- Program ID and version: Which tightening program was used
- Actual torque and angle curve: The measured values, not just the pass/fail result
- Result: Pass, NG type (cross-thread, missing, false seating, etc.)
- Timestamp: When the operation was performed
- Operator or robot ID: Who or what performed the operation
- NG disposition: If NG, what was done (rework, scrap, concession)
The traceability system must integrate with the factory's QMS (Quality Management System) boundaries. If the factory requires that every fastener be traceable to a specific assembly, the robot system must support that level of granularity. If the factory only requires batch-level traceability, the system can be simpler.
Robot interface control documents can capture the required event and status fields between the tightening controller and the factory QMS.
Sample Trial and RFQ Inputs
When requesting a quote for robotic screwdriving automation, the buyer should provide:
- Joint specifications: Fastener type, size, material, torque/angle requirements, quality standard
- Part drawings: Including hole dimensions, tolerances, access geometry
- Historical torque-angle curves: If available, from manual tightening or prior automation
- Access constraints: Clearance around the joint, obstructions, multi-joint patterns
- Cycle time requirement: Screws per minute or per shift
- Quality and traceability requirements: Pass/fail criteria, traceability level, NG handling
- Failure samples: Examples of cross-threaded, stripped, and missing-fastener conditions for method development
ISO 5393:2017 defines performance test methods for rotating tools used for threaded fasteners. It specifies how to measure torque, angle, and other parameters under controlled conditions. If referenced, the standard's scope (performance testing of the tool itself, not the joint or the robot) should be clearly stated. It does not provide torque specifications for specific fasteners or joint types.
Use robot pilot acceptance criteria to define the trial scope and decision thresholds for representative fasteners and failed joints.
Planning automated fastening for a specific assembly? Share fastener and joint drawings, the approved fastening specification, access constraints, feed method, cycle time and any required torque-angle records. AIsirRobot can help organize the application requirements and unresolved supplier questions before technical process validation.
Share on Social:


Contact Us
In This Article
Central Vacuum Pump vs On-Tool Ejector: Choosing the Vacuum Source for Robotic Picking
Oct 11, 2026
AMR Tugger Tow Capacity: Drawbar Pull, Cart Resistance, and Starting Loads
Oct 11, 2026
Robotics Teaching Labs: Specify the Student Exercises Before Choosing the Hardware
Oct 11, 2026
SCARA, Delta, or Six-Axis Robot: Choose by Motion, Orientation, and Work Envelope
Oct 11, 2026